In the ever-evolving world of UI/UX design, trends come and go, but some make a lasting impact due to their visual appeal and versatility. One such trend is glassmorphism. Figma glassmorphism combines transparency, blur effects, and vibrant colors to mimic the appearance of frosted glass. This modern and elegant look can significantly enhance the user experience by adding depth and a sense of realism. In this comprehensive guide, we’ll dive into creating stunning glassmorphism effects in Figma, step-by-step.
Figma Glassmorphism Understanding
Glassmorphism is a design style characterized by its use of semi-transparent layers, frosted glass effects, and soft shadows. This effect creates a sense of depth and layering, making the UI appear more interactive and three-dimensional. The core elements of glassmorphism include:
Transparency: The core feature, giving elements a see-through appearance.
Blur Effects: Usually a background blur creates the frosted glass effect.
Vibrant Colors: Often used in the background to enhance the glass appearance.
Soft Shadows and Borders: Subtle shadows and borders that define the glassy layers.
Getting Started with Figma
Before diving into creating glassmorphism effects, ensure you have Figma installed and a basic understanding of its interface. Figma is a powerful, web-based design tool that supports collaborative designing and prototyping, making it ideal for modern UI/UX projects.
Step-by-Step Guide to Creating Glassmorphism in Figma
1. Setting Up Your Canvas
Open Figma and create a new frame or choose an existing project where you want to apply the glassmorphism effect. Having a well-organized canvas is important for a smooth design process.
Create a New Frame: Click on the Frame tool (or press F) and draw a frame on your canvas. This frame will act as your workspace.

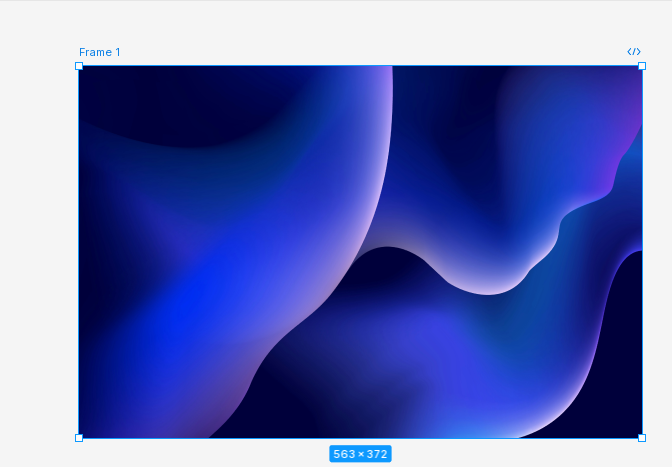
Choose a Background: A vibrant background enhances the glass effect. You can use a gradient, an image, or a colorful illustration.
2. Designing the Glass Panel
Next, we’ll create the shape that will serve as the glass panel.
Draw a Shape: Use the Rectangle tool (R) to draw a shape. This shape will act as your glass panel. You can also experiment with other shapes like circles or custom paths depending on your design needs.
Position the Shape: Adjust its size and position according to your design requirements.

3. Applying the Blur Effect
The blur effect is what gives the shape its frosted glass appearance.
Add Background Blur: With the shape selected, go to the ‘Effects’ section in the right-hand panel and click the ‘+’ icon to add an effect. Choose ‘Background Blur’ from the dropdown menu. Adjust the blur value until you achieve the desired frosted glass appearance. Typically, a blur value between 10-20 works well.
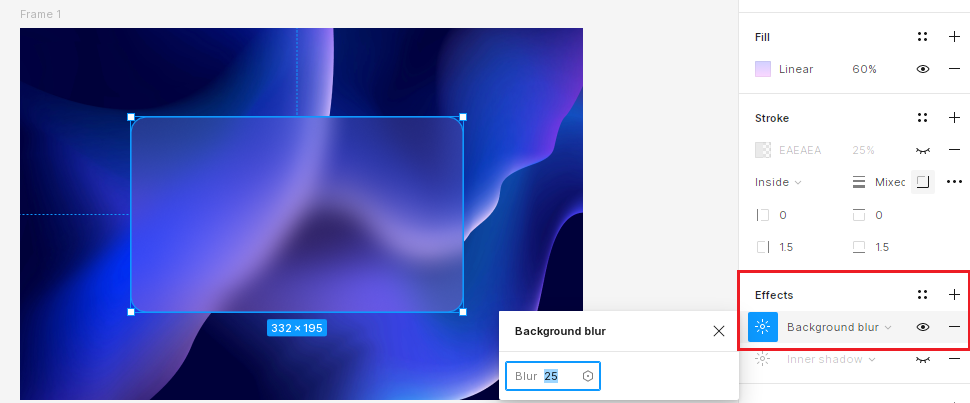
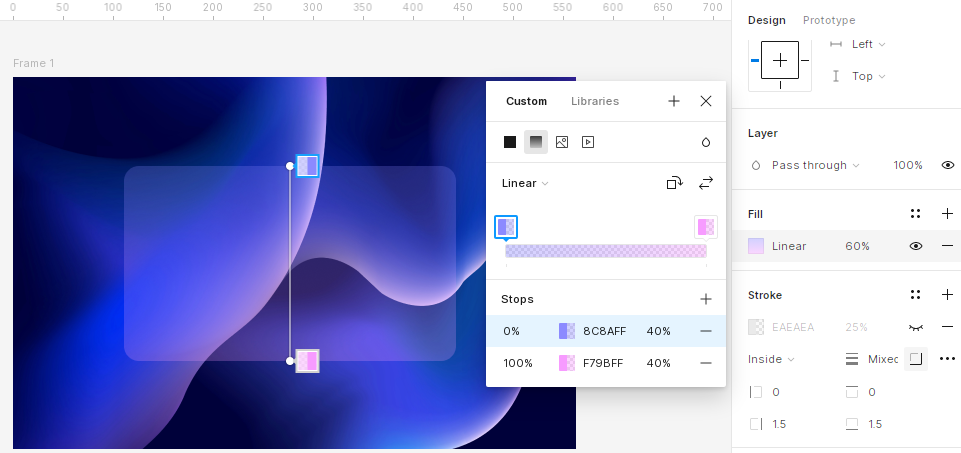
Adjust Fill Opacity: To enhance the glass effect, reduce the opacity of the shape. Go to the ‘Fill’ section and lower the opacity to around 30-50%. This will make the background partially visible through the shape, mimicking the translucency of glass.
4. Adding a Subtle Border
A subtle border can help define the edges of your glass panel.
Add a Stroke: Select the shape and go to the ‘Stroke’ section in the right-hand panel. Choose a white or light gray color for the border and set the stroke width to 1-2 pixels. Lower the opacity of the stroke to around 20-30% for a subtle effect.

5. Add Inner Shadows
Inner shadows add depth and enhance the glass effect.
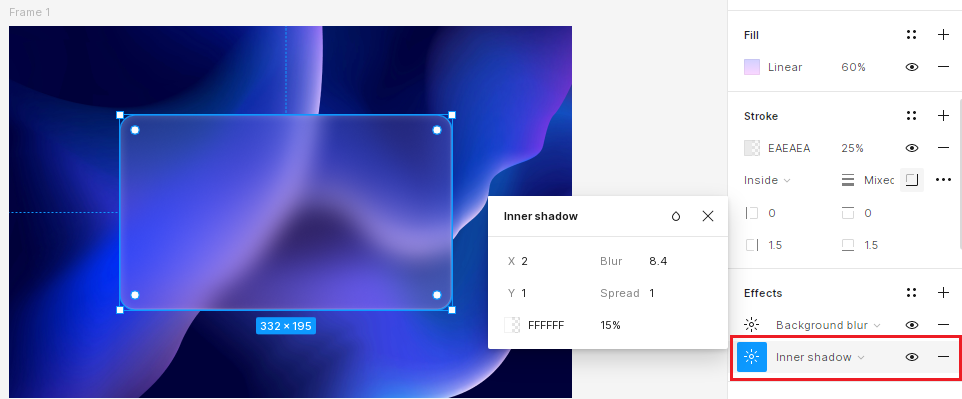
Add Inner Shadows: In the ‘Effects’ section, click the ‘+’ icon and select ‘Inner Shadow.’ Set the color to white with low opacity and adjust the blur and spread values to create a soft inner glow. This step helps in giving the glass panel a more three-dimensional appearance.
6. Adding Content
Place text, icons, or buttons inside the glass panel to make it functional and visually appealing.
Add Text: Use the Text tool (T) to add any necessary text inside the glass panel. Ensure the text contrasts well with the background for readability. White or light-colored text works best.
Insert Icons and Buttons: Add icons or buttons as needed. Ensure they are legible and interact well with the glass effect.
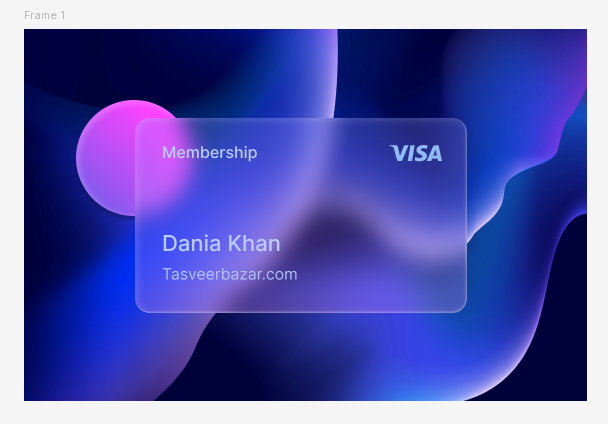
Enhancing Your Glassmorphism Design
Using Multiple Glass Panels
Layering multiple glass panels with varying blur and opacity settings can create a more complex and interesting design.
Create Additional Panels: Repeat the steps above to create more glass panels. Position them strategically to create a layered effect.
Vary the Blur and Opacity: Adjust the blur and opacity levels slightly for each panel to add depth and variety.
Combining with Neumorphism
Neumorphism is another popular design trend that can be combined with glassmorphism for a unique look. Neumorphism involves using soft shadows and highlights to create a 3D effect.
Add Soft Shadows: Use the ‘Drop Shadow’ effect to add soft, subtle shadows to your glass panels, making them appear raised in the background.
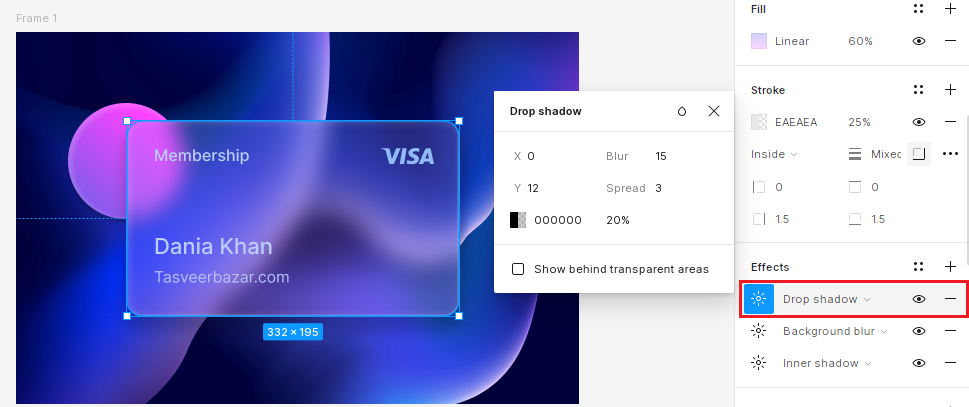
Create Highlight Effects: Add light-colored highlights on the edges to enhance the 3D effect.
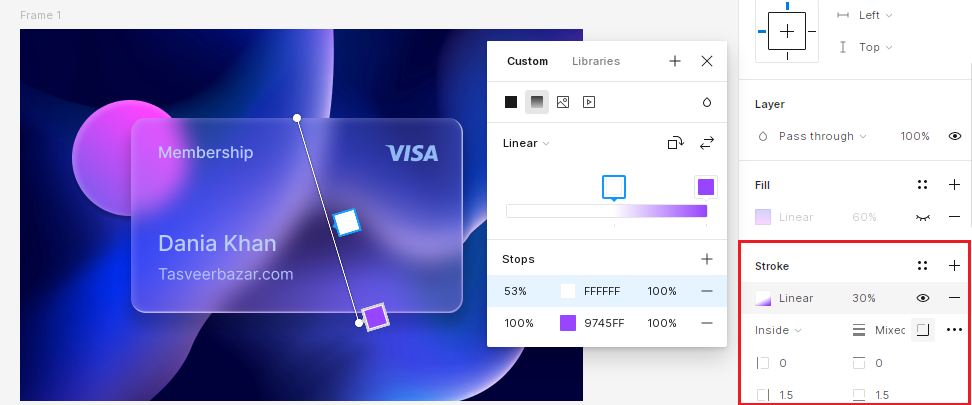
Best Practices for Glassmorphism
While glassmorphism can significantly enhance your design, it’s essential to use it thoughtfully. Consider these best practices:
Consistency
Maintain a consistent blur and opacity level across different glass elements to ensure a cohesive look. Inconsistencies can make your design appear cluttered and disjointed.
Contrast
Ensure sufficient contrast between the glass panels and the background to maintain readability. If the background is too vibrant or the glass panel is too transparent, the content may become difficult to read.
Subtlety
Avoid overusing the effect; subtlety is key to maintaining a sophisticated design. Overuse can make your design overwhelming and reduce its visual impact.
Conclusion
Glassmorphism is a versatile and visually appealing design trend that can improve the aesthetics of your UI designs. By following the steps outlined in this guide, you can create beautiful glass effects in Figma that add depth and sophistication to your projects. Remember to experiment with different settings and combinations to find the perfect look for your design. With practice and creativity, you’ll be able to incorporate glassmorphism into your designs effectively, creating stunning and modern user interfaces.